The Operating Guide of WHP® Mixing Tubes (2)

Feb 04,2021
Tags:

The Things We Should Concern

  1. 1. Misalignment between the orifice and the mixing tube.
  2. 2. Chipped orifices.
  3. 3. Mixing chamber wear.
  4. 4. Chipped mixing tube.

2.1 Visual Inspection to Waterjet Nozzle Wear

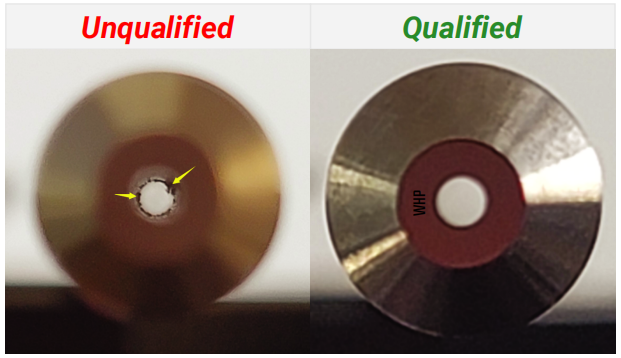
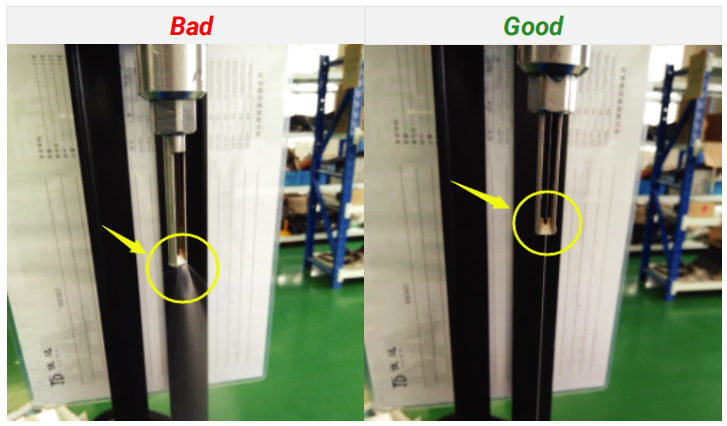
Every time when you replace with the new nozzles, you’d better have a visual inspection before installing it.

(Figure 1)

2.2 Concentricity Test - Low-pressure

Operating:

  1. step 1. Put WHP Alignment Scout inito the mixing chamber, and place the orifice right in its position.
  2. step 2. Remove the hopper end of the abrasive feed tube from the abrasive flow gate.
  3. step 3. Turn on the power after tighening up the nozzle nut.
  4. step 4. Select Water Only and Low Pump Pressure.
  5. step 5. Click Start to start the concentricity test in hte low-pressure mode.
  6. step 6. Use the Low Pressure adjustment knob on the high-pressure pump to set the desired preset low- pressure cutting pressure.
  7. step 7. When the jet stream begins, pinch the loose end of the abrasive feed tube to block air flflow through feed tube. Air from this tube interferes with the jet stream, making inspection difficult.
  8. step 8. Check the water flflow in the WHP Alignment scout
(Figure 2: tested by "Alignment Scout")

2.3 Examine The Jet Stream

(Figure 5)

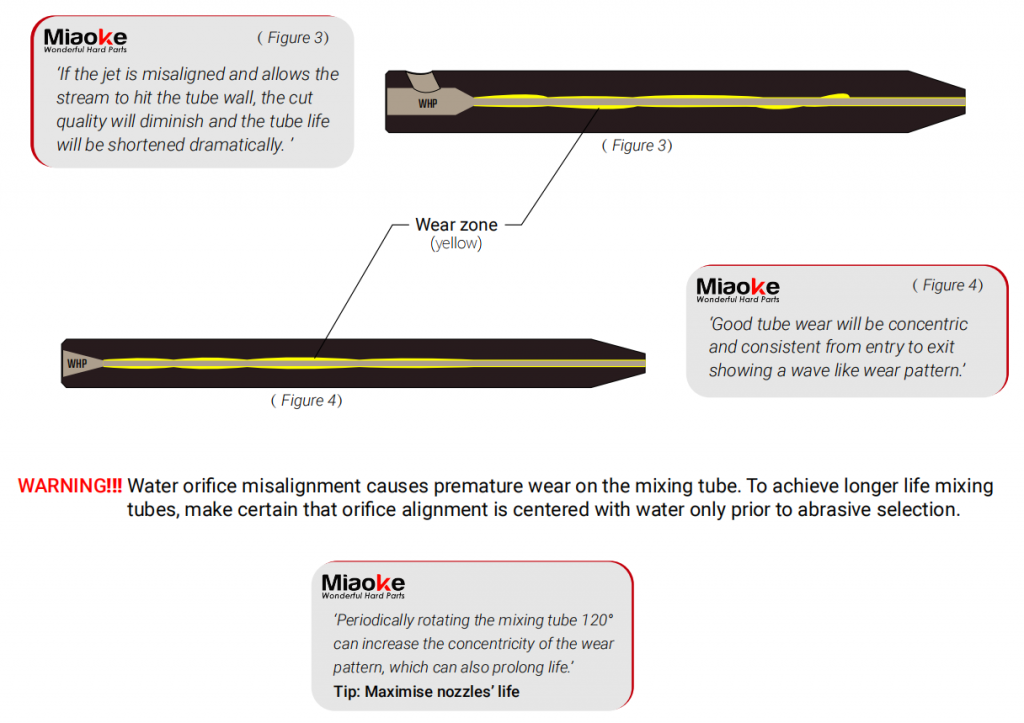
"WHP Alignment Scout is launched to solve this problem. Usually When a waterjet nozzle wron, we don't know if it's the problem which caused by orifice or some other parts of the cutting head. Alignment Scout can help you adjust the misalignment between the orifice and the mixing tube."

Miaoke Precision